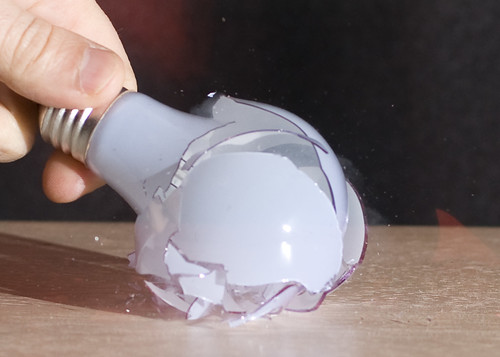
Showing posts with label flash. Show all posts

Monday, January 18, 2010

Sound Triggers


As a kid,
I loved pictures of things that happened too fast for the human eye to see. The beating of a hummingbirds wings frozen in time or the classic bullet slicing through a playing card photo always fascinated me.

When I started looking around...
at how to make such images, I found enough information to build something called a "sound trigger" This is a little electronic circuit that can fire a camera flash in a dark room when triggered by a sharp sound. Snap your fingers and the flash fires. Pretty neat!
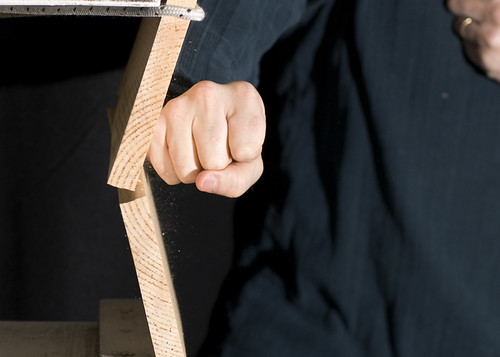


Building the kit was fairly straight forward, but hooking it to the flash was not. I jury-rigged a hot shoe, of sorts, with some aluminum and speaker wire. It was crude, but it worked.

Now for the set up:
In order for this to work, you need a dark room and a remote shutter release. I set up in the garage with my camera on a tripod pointed at a board about 3 feet away. The camera was set to a 3-second exposure at f/4.5 and ISO 200 (manual focus of course). I turned off the lights and made my way back to the board where the camera was aiming using a flashlight. Here's the sequence of events:

  1. Grab an object to be broken (a CD, a light bulb etc...)
  2. Turn off the flashlight
  3. Remote trigger the shutter
  4. Break the object
  5. Wait for the shutter to close
  6. See what you got!
  7. Repeat

Because the flash...
fires so fast (about 1/10,000 of a second!) and the room is dark, the camera's sensor is able to capture the action at that speed. Its a pretty simple concept that can work with any camera with manual mode and a remote trigger.
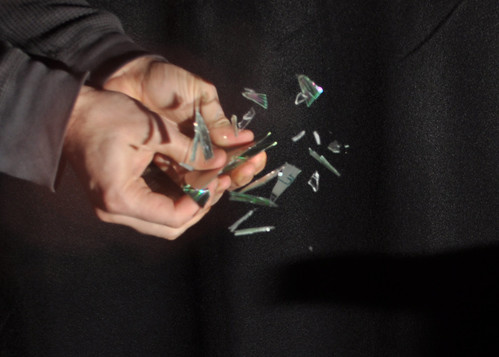


It took a while to catch the action at just the right moment to make an interesting photo. To adjust when the flash fires, I needed to move the sound trigger either closer or farther from the breaking object. Sound take time to travel.

Another issue...
is that sometimes the falling pieces are loud enough to re-trip the flash and give you a double exposure. I found I had to time it so the shutter would close right after the object broke.

In the end I learned a great deal about this type of photography *and* got some pretty good images too! These are among my most popular on Flickr.

Give it a try! You might find its like being a kid again!

Further reading:

Sound Triggers
Flickr High Speed Group
Some Awesome Shots


Sunday, July 5, 2009

What's A Clamshell?

Recently,
I was fortunate enough to purchase a Nikon SB900 Speedlight (a camera flash). I have been eyeing this one for several months now and finally got up enough nerve to make the purchase. Joe McNallys book, "The Hot Shoe Diaries" has been instrumental helping my understanding.

One of the reasons that this flash is so useful is that it works using the Nikon Creative Lighting System (CLS). This system en
ables the flash and the camera to "have a conversation" about how much light should be used to properly expose the subject. The Canon equivalent is "eTTL" which does pretty much the same thing. The amazing thing about both of these systems is that this conversation happens in a few milliseconds and yields some pretty impressive results!


In this shot...
The Nikon D90 camera acted as the master unit, controlling the output of the new SB900 (camera left at 7 feet high and aiming downward) and the SB600 (camera left at 2 feet high and aiming upward). Each flash was softened using a translucent "shoot through" umbrella. I used a white bounce card (camera right) to light her left side. The background was illuminated using my old Vivitar flash with the hot shoe slave. Because the studio is shallow, I had a tough time getting the background lit evenly. Here is the set up shot for reference:


Because ...
The umbrellas are facing one another, the setup is referred to as a "clam shell". One nice thing about this type of a set up is that both flashes are on one lightstand making it very easy to adjust. The lower flash is held in place on the stand using a Justin clamp.

As you may have noticed by now, I tend to gravitate toward inexpensive (don't say cheap...) studio equipment. One reason for this is that I see the real value in the high tech electronics (flashes, camera bodies, slaves and the like). A simple satin umbrella, or tubular steel lightstand is relatively low-tech and should be priced accordingly.

One thing

That I notice now, is that I tend to look at magazines, websites, and billboards differently. I'm looking for how the lighting was done. And now I'm starting to understand!

Monday, June 8, 2009

Cold Shoes?

Setting up a One Light Studio

A while ago, I set up a studio in my garage. Part of the fun of it was figuring out what to buy and how it would fit together. I knew that I needed to mount a flash onto a light stand, but how does that work? The light stand has a stud or a post, and the flash is meant to be mounted onto the camera's hot shoe?

Luckily, Adorama has pretty good pictures of what the items look like. I ended up buying a "Universal Swivel Holder" which attaches to the stud at the top of the light stand and allows you to mount a flash onto its "cold shoe".

Oops!
There was one small problem though. The cold shoe is made of aluminum and would likely short out my flash. See all those little pins on the bottom of the SB600? I'm sure that mounting the shoe onto a metal surface would fry my $300.00 flash. No Thanks!


Necessity is a mother...
I had to come up with a solution. Here's what I did: I have some plastic (PET) packaging material from one of the recent gadgets I've acquired. I cut it into an "H" shape and slipped it into the cold shoe. I cut it so that it would be nice and snug and wouldn't fall out when I loaded the equipment into my bag for on-location shoots.

Onward!
Now it was just a matter of attaching the flash to the swivel, then attaching the swivel to the light stand, then adding the shoot through umbrella, and a white bounce card, I was all set for a One Light Portrait.


Monday, June 1, 2009

Hot Shoe Slave

No, this post has nothing to do with footwear...

I have an old Vivitar 3600 flash that I'd forgotten about. I used to use it on my film SLR back in the day... Of course when I got my digital SLR, I thought I would just slap it on the hot shoe and I'd be golden.

Not So Fast....
Apparently, the voltage for TTL flashes have changed over the years. I know this to be true for Nikon, but it wouldn't surprise me if it were true for Canon, Olympus, and other brands as well. So what now? Shell out 300 bucks for a shiny new SB600? Oh wait a minute, I'm cheap!

Hot Shoe Salvation!
There is a company called Wein that makes a hot shoe slave. I got mine from Keeble and Shuchat in Palo Alto for about 60 USD. It was actually cheaper than Amazon, and I got to take it home and play with it that same day.

What this device did for me was pretty neat: It turned that functionally-useless 15-year-old Vivitar 3600 into a slave flash. It uses the available flash pulse from my camera's built in (pop-up) flash and triggers the slave. Most digital cameras have several pre-flash pulses to meter the light before they pop off the real deal with the shutter open. The Wein HSD ignores these pulses, firing only when the shutter is open. The coolest thing about this gadget is that it uses no external power.

No TTL?
Why did that exposure come out way to bright? Unfortunately I have to run the slave flash in manual mode

I only use this one indoors. I've read complaints about using it outdoors and that makes sense to me; That light sensor on the HSD might not be able to notice that your wimpy pop-up flash went off when it's looking at the sun.

So for about 1/5th the cost of a new flash, I was able to re-purpose my old one. What's in your old camera bag?
as there is no provision for the flash and the camera to negotiate the exposure (unlike E-TTL or CLS flashes) For me, I have two choices: Full Blast, and -4. Full bast is really REALLY bright and it takes a long time for those poor little batteries to recharge the unit for the next shot. I run mine at -4 most of the time. There are occasions when even -4 is too bright. For those days, I use a neutral density (gray) filter (gel) that brings the flash down about 2 more stops.

Thursday, May 28, 2009

Justin Clamp

A few weeks ago, I purchased a new strange-looking but oh-so-useful item called a "Justin Clamp" Its actually a "Manfrotto 175F Spring Clamp w/shoe flash" and it costs about 50 USD but its well worth it.

Lets take a look at it shall we?
First off you'll notice that it resembles a "chip clip" and functions the same way but with a really beefy spring. The flat gripping surface has 4 stiff rubber inserts on each side that allow it to clamp securely on cylindrical objects (think-- light stands, pipes, tree branches, dining room chairs, etc...)

Sticking out of the top is a nice cold shoe on which to place your flash. The flash is held securely by rotating a lock ring up against the base of the flash. The shoe is attached to a ball and socket that allows the flash to tilt and swivel in any direction. Tighten the clamp to lock it down and prevent movement.

Just below the swivel and in the center of the spring is a standard light stand post allowing you to attach it or other parts of your lighting gear.

On the very bottom is a female post clamp, if that's the proper term, with a thumb screw to lock it securely to the male post on your light stand.

Overall the design is really functional. Now you can hang a flash securely just about anywhere.

Here I have it mounted to the top of a light stand allowing me to aim the old Vivitar 3600 flash at the back of a diffuser. I use this as the main light for portraits because it gives me a 3-foot square of soft light that looks great for head and shoulders shots. Starting at the top, the flash is connected to the cold shoe and lock ring. The female post clamp is firmly attached to the post at the top of the light stand. I'm not using the spring clamping feature here, but its just an example of how versatile the "Justin Clamp" really is.

This is definitely one of my favorite pieces of photo-geek-gear!

Sunday, May 24, 2009

Shooting Through Glass


Have you ever been disappointed at photos taken through a glass display case? Perhaps you were at a museum or the zoo trying to capture the memory of that animal on the other side. How about shooting through a tour bus window? Was there a lot of distracting glare? Here's a few tricks that photographers use to avoid this situation:

  1. Wear black - Many times the glare comes from what you are wearing. A black jacket or shirt can do a lot to shield stray light.
  2. Shoot off angle - If your using a flash, it will certainly bounce off the glass and ruin the shot. Try moving off axis by 30 degrees or so.
  3. Shoot head on - Crank up the ISO on your camera to use the available light in the display case. Turn off your flash and get as close to the glass as you can. You can even lightly rest the lens on the surface of the glass, provided the optics in your lens don't touch and cause a scratch. The glass will help steady the camera so you don't get any motion blur.
  4. Use your hands - Cup your hand around the lens to block out the stray light. You might even try asking your spouse, child significant other to cup his or her hands around the lens.
  5. Lay something dark on the floor - If the room has a light colored floor causing the glare, lay your dark jacket on the floor to block it out.
  6. Hold smomething dark near the camera - Move the camera out of the way and look at where the reflection is coming from. Use a dark jacket spread over your hand to see if you can get rid of the reflection. Then replace the camera and take your shot
Try these out next time you know that there will be a piece of glass between you and a great photo.

Tuesday, May 19, 2009

Using a "Snoot" for emphasis

What's A Snoot?

Imagine you're taking an indoor picture but want to use lighting draw attention to just the subject. You reach for your flash and attach it to your camera. What do you expect that you'll see?

Probably very even lighting. Manufacturers go to great lengths to balance the spread of the light coming from the flash so that it illuminates the whole frame. Hmmm, That not really what we want in this case, so what do we do?

Enter one of the most elegantly simple device to modify your flash, The "Snoot". Its basically a tube that you place on your flash to focus the beam where you want it. The one I have , by Honlphoto, wraps around your camera flash and attaches with velcro.


This model costs about 30 bucks, has a shiny inside and a flat black outside and is very well made. You could probably make your own for much cheaper, but this one looks like something a professional would use. Below is a test shot I made to illustrate the shape of the light beam as it hits the flat wall. Pretty cool!


Now lets put it to use: In this shot, I'm trying to get the effect of a glow coming from this young boy's new phone. I used the snoot and the off camera flash, handheld by an assistant. The eerie blue glow comes from another off camera flash with a blue filter on it, and bouncing off the cieling. Have a look and tell me what you think?


One thing I'll mention is that the size of the spot is related to the aspect ratio, or the diameter to length ratio. A smaller diameter on a longer length will give you a smaller spot and allow you to keep your distance away from your subject. This is also true for grids or home-made "black straw snoots. More on that later. For now, get out your camera and go take some pictures!


Sunday, May 17, 2009

What's a Grip Head?


This weekend, I stopped by Keeble and Shuchat to look for something that would let me hang the home-made screen flash diffuser. I needed to get the diffuser much closer to the subject and mounting it directly to a light stand wasn't working out well.

At the store, there were several other customers renting studio gear. I have to admit I was kind of intimidated looking at all the stuff there. Being new at this, I had no idea what most of those items were. I ended up buying a "grip head" by Manfrotto, that fits on the top of a light stand and allows a boom (a steel rod) to extend horizontally. The grip head cost about 39.00 USD and is very well made. In this photo, you see a lightstand at the left, with the grip head holding a boom. The skylight panel is attached to the end of the boom close to the model. Notice how even the lighting is on her left side. The flash is softened quite a bit.