skip to main |
skip to sidebar
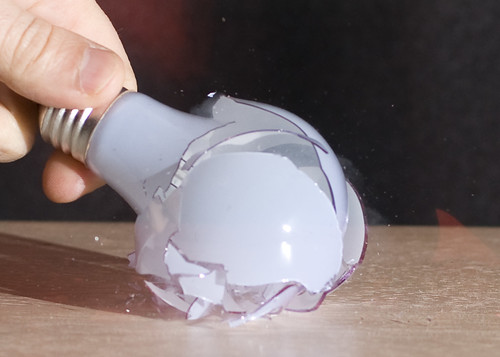 As a kid,
I loved pictures of things that happened too fast for the human eye to see. The beating of a hummingbirds wings frozen in time or the classic bullet slicing through a playing card photo always fascinated me.
When I started looking around...
at how to make such images, I found enough information to build something called a "sound trigger" This is a little electronic circuit that can fire a camera flash in a dark room when triggered by a sharp sound. Snap your fingers and the flash fires. Pretty neat!
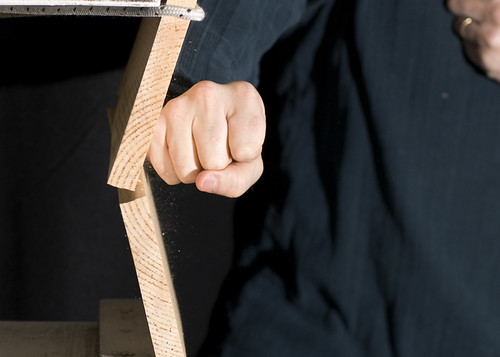
Building the kit was fairly straight forward, but hooking it to the flash was not. I jury-rigged a hot shoe, of sorts, with some aluminum and speaker wire. It was crude, but it worked.
Now for the set up:
In order for this to work, you need a dark room and a remote shutter release. I set up in the garage with my camera on a tripod pointed at a board about 3 feet away. The camera was set to a 3-second exposure at f/4.5 and ISO 200 (manual focus of course). I turned off the lights and made my way back to the board where the camera was aiming using a flashlight. Here's the sequence of events:
- Grab an object to be broken (a CD, a light bulb etc...)
- Turn off the flashlight
- Remote trigger the shutter
- Break the object
- Wait for the shutter to close
- See what you got!
- Repeat
Because the flash...
fires so fast (about 1/10,000 of a second!) and the room is dark, the camera's sensor is able to capture the action at that speed. Its a pretty simple concept that can work with any camera with manual mode and a remote trigger.
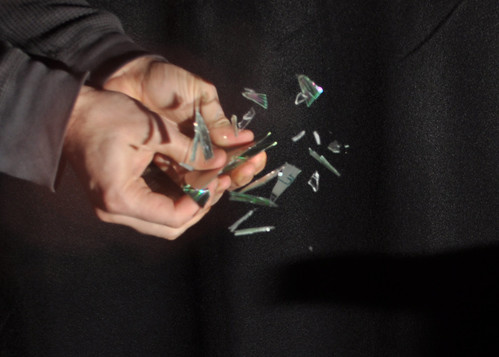
It took a while to catch the action at just the right moment to make an interesting photo. To adjust when the flash fires, I needed to move the sound trigger either closer or farther from the breaking object. Sound take time to travel.
Another issue...
is that sometimes the falling pieces are loud enough to re-trip the flash and give you a double exposure. I found I had to time it so the shutter would close right after the object broke.
In the end I learned a great deal about this type of photography *and* got some pretty good images too! These are among my most popular on Flickr.
Give it a try! You might find its like being a kid again!
Further reading:
Sound Triggers
Flickr High Speed Group
Some Awesome Shots
 Lately
I've been inspired by some of the macro photography seen on Flickr. Years ago I had a Minolta X700 SLR. Being a college student at the time, I had little money for gear. One thing I did have that was relatively cheap was something called a "Reversing Ring"
This little gem threaded onto the front of my 50 mm lens (my *only* lens) and allowed it to be mounted backwards. Flipping the lens around moves the focal point further in front of the film plane of camera which does two things:
- It increases the magnification
- It decreases the minimum focal distance (allowing you to get really close to your subject)
Essentially, using a reversing ring converts your 50 mm "portrait lens" into a really nice "macro lens" and it does so for less that 20 bucks! There are no additional optics involved. There are some drawbacks to the reversing ring however, is that neither the aperture or the auto-focus works.
Getting a bonafide macro lens will set you back about 500 dollars, but you get full aperture and auto-focus control. Still, the limited utility make this route hard to fathom for the average hobbyist. I mean, with a macro lens, you can only shoot macros, right?
There is another low-cost solution.
Something called an "extension tube" can accomplish the same task as the spendy macro prime lens, but only costs about 90 bucks. Kenko offers a set of three for about $170. An extension tube mounts onto the back of your lens and then onto the front of your camera. They have electrical and mechanical pass-through connections that operate both the aperture and the auto-focus system on some cameras. Tubes come in various lengths (measured in mm) the longer the length, the higher the magnification.
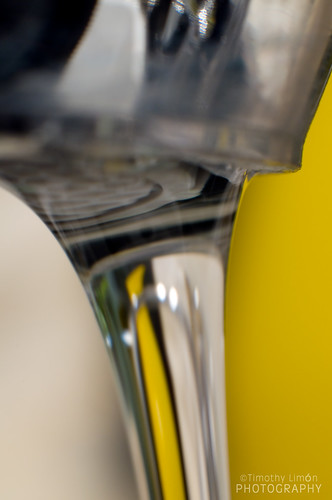 In use,
these tubes expose a whole new world of wonder. In the lead photo at the top, for example, a simple chrome handle becomes something magical, reflecting the entire room. If you look closely, you can see the blades of lens's aperture showing that it was stopped way down to get the maximum depth of field.
So consider
getting a reversing ring or an extension tube to get a new perspective on everyday objects. You'll be glad you did!
Further Reading:
Flickr Group "Closer and Closer"
Reversing Rings
Extension Tubes

Sometimes
I look at a published photo and say to myself: "I could shoot that!" We have all said that from time to time, but could you really? How do you know how your work would stack up?
There are two ways that I know of to find out: Contests and Critiques
Entering photo contests can be a bit scary, but rewarding if you can keep at it. The other day I was talking to one of my photographer friends who'd won a photography contest for his school. He was excited at receiving the notoriety and earning the respect of others. We are all a bit insecure on the inside, especially as artists, so winning a contest is like a validation.
As we spoke,
I remembered a contest I'd won back when digital images were far less known. In 2000, our local paper, the San Jose Mercury News was running a digital photo contest.
Entrants were asked to email their best shot to be judged among others. I'd taken this photo four years prior on a Winter's day with my SLR and Kodak ASA 200 film. I have to credit my wife, Lilia, for suggesting the shot after my daughter fell asleep on the baby scale. The image came out a little too blue for my taste; the kitchen skylight was the culprit, so I scanned the print and adjusted the color balance to warm things up a bit.

I remember finding out that I'd won a week or so before the story ran. One of the editors requested the file in TIFF format for printing. The image barely fit on a floppy disk.
The day the paper came out was pretty cool. Phone calls from local family members and a few kind-hearted strangers made that day very special to me. I was published!
Another way is through critiques.
Its so easy for us to share our images these days. Sites like Flickr and Picassa make it simple to expose your art to the public eye. Anyone can comment on your image, but if you are trying to improve, these comments are generally only positive.
What's missing is the critique. There are groups within Flickr that will provide feedback on your images; Try searching for "critique" and join. Keep in mind that you'll get many differing opinions and be ready to get slammed once in a while. Remember, what doesn't kill you makes you stronger!
So enter a contest the next time you see one. Be wary of those with an entry fee. (See the link below for further reading.) Join Flickr and then a "critique" group. Remember only upload your best work, and don't be afraid of the negative comments Each one adds a little clarity to your vision!
Further reading:
Scott Bourne's take on contest legitimacy.
Flicker critique groups


 Posts
Posts


